Start With What You Have
If you’ve got an old door in the garage, a few worn out pallet boards, or some leftover wood from past projects, you’re halfway to a headboard. Upcycling materials like these isn’t just a money saver it’s a smarter, greener way to build. Skip the overpriced big box options and give new life to what you’ve already got.
Reclaimed wood is rich with character nail holes, weathered grain, even paint remnants become visual highlights. Same goes for antique doors or panels: when mounted horizontally, they can become instant statements behind the bed. Just clean, sand, then seal or stain for a finished look. Got a few mismatched pieces? Embrace it. A patchwork of varied planks can look more custom than any store bought option.
When sanding, go with the grain and start coarse (around 80 grit) before working up to finer grades like 220. Want rustic? Keep it rough. Prefer polish? Smooth it out and layer on a wood conditioner before staining. A few coats of polyurethane or a matte sealer helps lock in the look and keeps stray splinters off your pillows.
Paint’s also fair game. Try a bold solid in matte or eggshell, or go two tone with tape for crisp color blocking. Upcycled doesn’t mean sloppy. With a bit of prep and finish work, your DIY headboard will look handcrafted, not just handmade.
Upholstered Looks Without the Price Tag
You don’t need a big budget to get a headboard that looks and feels high end. All it really takes is foam, fabric, and a staple gun. First, choose a base plywood is a solid and affordable option. Cut it to match the width of your bed. Pad it with foam (1 to 2 inches thick is plenty), then layer on some batting to soften the edges. Drape your chosen fabric over the top and pull it snug. Staple it down on the back, working from the center outward to avoid wrinkles. Keep it tight clean tension is what makes it look pro.
When picking fabric, go for durability and feel. Cotton twill, linen blends, and velvet all work well. Avoid anything too thin or stretchy it’ll show every bump. Want to add flare? Try tufting the headboard with fabric covered buttons or lay in a few rows of nailhead trim. These little details turn basic into custom.
The result: a plush, tailored headboard that looks like it came from a boutique hotel, not your weekend toolkit.
Statement Designs That Speak Your Style
You don’t need a traditional headboard to make a strong visual statement. Painted wall panels offer an easy way to fake the look and they let you play with color, pattern, and geometry. Think vertical slats in a bold hue, or a half wall paint technique that draws the eye upward and adds height to your bed area. No bulky furniture required.
Another route: skip the headboard altogether and hang framed prints or bold artwork right above the bed. Gallery style arrangements can add personality, while one dramatic piece offers a sleek, minimalist vibe. The trick is to align the artwork’s bottom edge just inches above your pillows, where a headboard would normally sit.
Feeling more adventurous? Lean into unexpected materials and shapes. Scalloped wood cutouts, curved plywood arches, or even a woven room divider can double as a headboard and a style statement. These organic lines feel fresh and modern, and can be mounted with surprisingly little effort. It’s all about rethinking the shape and texture of what frames your space.
Functional and Stylish Options
When you’re tight on space, your furniture has to work harder. That’s where headboards with built in shelves or lighting come in. Think of them as quiet multitaskers holding books, a glass of water, or your phone charger without the need for a bulky nightstand.
Many DIYers are getting creative with floating shelf units mounted just above or behind the bed frame. Just make sure to anchor them well no one wants a midnight surprise from falling decor. Want a softer glow for late night reading? Skip the table lamps and go for lightweight sconces or clamp lights. You can wire them through the back panel or thread battery powered puck lights into the wood. It’s a quick upgrade with a clean look.
These headboard hacks are made for dual purpose bedrooms, like studio apartments or guest rooms that double as home offices. Slim profile, high function. No clutter, no fluff. Just smart design that keeps your essentials close and your bedroom looking sharp.
Low Cost, High Impact Ideas
You don’t need custom carpentry or a big budget to make a bedroom look intentional. Peel and stick wallpaper is one of the fastest ways to add depth and style behind your bed. Pick a bold geometric or natural pattern, line it up just above the mattress, and you’ve got an instant visual anchor no power tools, no paint fumes.
For something with more texture, think beyond the wall. A large tapestry or a rug hung horizontally can double as a headboard in minutes. It softens the space, absorbs sound, and makes everything feel more grounded. Even a large canvas drop cloth can work fold, dye, or stencil it to fit your vibe.
If you lean minimalist, there’s still room for creativity. A few strips of washi tape forming an outline of a shape or simple border above your bed can do the job. Or grab a brush and paint a clean rectangle or arch in a contrasting color. It’s subtle, graphic, and doesn’t demand more than a Sunday afternoon.
These tricks are light on cost but heavy on presence and versatile enough to swap out when your taste shifts.
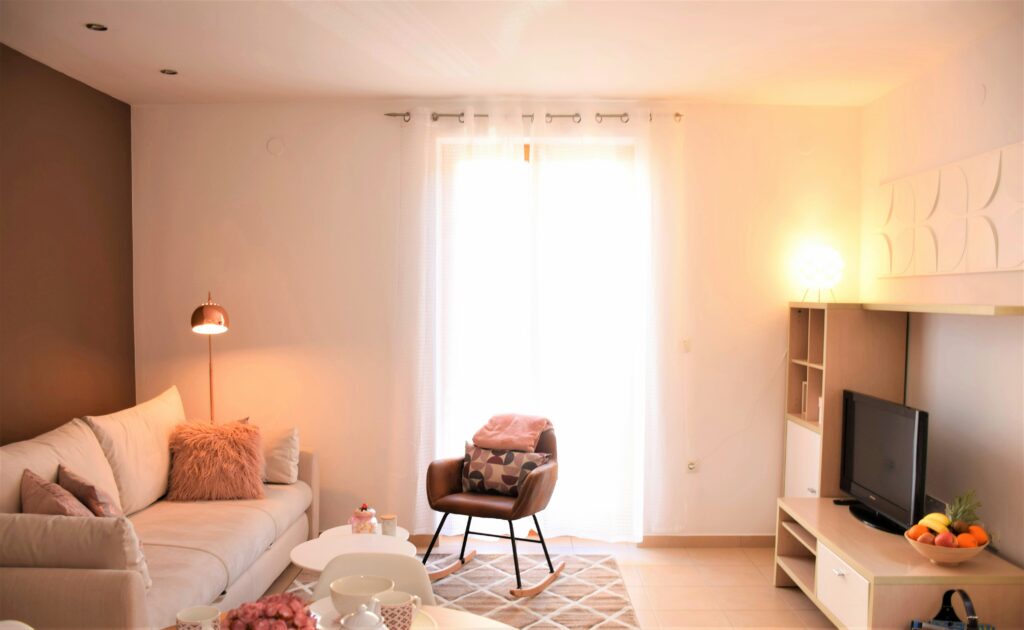
Tie the Look Together
A DIY headboard can do more than anchor your bed it can define the entire mood of your bedroom. Whether you’ve built something bold or minimalist, cohesion is key.
Coordinate with Existing Elements
Make sure your headboard complements, rather than clashes with, your surroundings.
Match colors and materials with nearby furniture like bedside tables, dressers, or lamps.
Echo textures or finishes for example, tie in natural wood tones, soft fabrics, or matte metals.
Stay within a consistent theme, whether it’s rustic, modern, boho, or vintage.
Create a Cohesive Focal Point
Let your headboard serve as the visual anchor of your space:
Choose accessories, such as throw pillows, duvet covers, or wall decor, that pull from the color palette or style of your headboard.
Build symmetry by placing matching lamps or wall art on either side, drawing the eye toward the center.
For intentional room design, use your headboard as the launching point. Here’s how to decorate your bedroom around it.
Think About the Big Picture
A headboard should stand out but not stick out.
Be mindful of contrast: will your headboard pop too much or blend in too little?
Avoid overwhelming patterns or designs that fight with other strong features in the room.
Always ask: does this design add harmony or noise to the space?
With intentional styling, your DIY headboard won’t just be a piece of furniture it’ll be part of the story your bedroom tells.
Final Practical Tips
Before you break out the drill or the washi tape, make sure your measurements are solid. The wall width, bed size, and ceiling height all come into play when designing or installing a headboard. Too big and it overwhelms the space. Too small and it just looks like an afterthought. A tape measure and a bit of math now save a lot of regret later.
Mounting securely isn’t optional it’s the backbone of durability and safety, especially for heavier pieces like wood panels or shelving headboards. Use wall anchors if you’re dealing with drywall. For renters, consider damage free mounting hardware or keep your design freestanding but stable.
And finally, don’t let budget limit your creativity. A strong design doesn’t need to cost much. Use what you have. Shop second hand. Add a personal detail a stenciled word, a color that makes you feel something, a fabric that reminds you of your travels. DIY is about making something that’s yours, not something that just looks like everyone else’s.
Want more ideas on how to tie everything together? Here’s how to decorate your bedroom with smart, cohesive choices.
 Jordanae Lewisters has opinions about sustainable living solutions. Informed ones, backed by real experience — but opinions nonetheless, and they doesn't try to disguise them as neutral observation. They thinks a lot of what gets written about Sustainable Living Solutions, DIY Projects and Ideas, Home Design Inspirations is either too cautious to be useful or too confident to be credible, and they's work tends to sit deliberately in the space between those two failure modes.
Reading Jordanae's pieces, you get the sense of someone who has thought about this stuff seriously and arrived at actual conclusions — not just collected a range of perspectives and declined to pick one. That can be uncomfortable when they lands on something you disagree with. It's also why the writing is worth engaging with. Jordanae isn't interested in telling people what they want to hear. They is interested in telling them what they actually thinks, with enough reasoning behind it that you can push back if you want to. That kind of intellectual honesty is rarer than it should be.
What Jordanae is best at is the moment when a familiar topic reveals something unexpected — when the conventional wisdom turns out to be slightly off, or when a small shift in framing changes everything. They finds those moments consistently, which is why they's work tends to generate real discussion rather than just passive agreement.
Jordanae Lewisters has opinions about sustainable living solutions. Informed ones, backed by real experience — but opinions nonetheless, and they doesn't try to disguise them as neutral observation. They thinks a lot of what gets written about Sustainable Living Solutions, DIY Projects and Ideas, Home Design Inspirations is either too cautious to be useful or too confident to be credible, and they's work tends to sit deliberately in the space between those two failure modes.
Reading Jordanae's pieces, you get the sense of someone who has thought about this stuff seriously and arrived at actual conclusions — not just collected a range of perspectives and declined to pick one. That can be uncomfortable when they lands on something you disagree with. It's also why the writing is worth engaging with. Jordanae isn't interested in telling people what they want to hear. They is interested in telling them what they actually thinks, with enough reasoning behind it that you can push back if you want to. That kind of intellectual honesty is rarer than it should be.
What Jordanae is best at is the moment when a familiar topic reveals something unexpected — when the conventional wisdom turns out to be slightly off, or when a small shift in framing changes everything. They finds those moments consistently, which is why they's work tends to generate real discussion rather than just passive agreement.