Why Garden Boxes Are a Smart Move in 2026
If you’re short on yard space or don’t have one at all garden boxes are your ticket in. They let you grow a lot in a small footprint. Raised off the ground, they help cut down on weeds and give you better control over soil health, which means fewer mystery pests and better growth from day one.
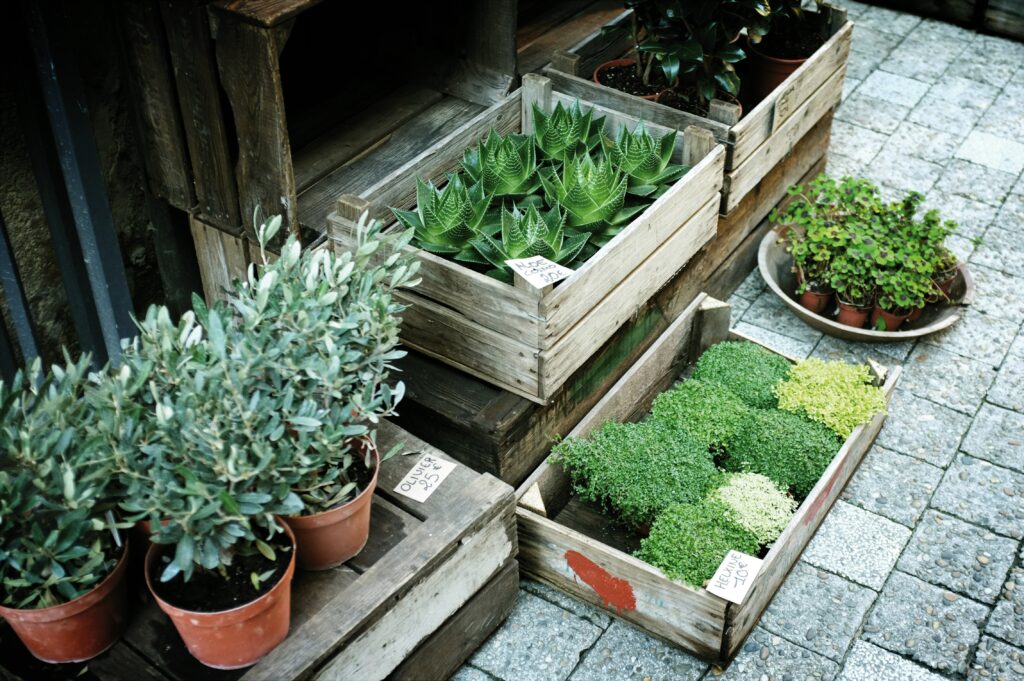
Whether you’ve got a patch of gravel behind your house, a cozy city balcony, or a full on backyard, garden boxes flex to fit. You can build them any size, stack them if you’re serious, or just start with one basic frame to test the waters.
New to gardening? This is your on ramp. Low commitment. High reward. Just a few square feet and a Saturday afternoon gets you going. It’s not about being perfect it’s about getting that first lettuce to sprout.
Materials That Won’t Break the Bank
You don’t have to spend big to build effective garden boxes. Untreated pine is one of the most affordable choices out there. It won’t last as long as hardwood, but it’s solid for a few seasons, and a good starting point if you’re just testing the waters. Cedar costs a bit more, but it holds up better against moisture and bugs so you get more years out of each board. Reclaimed wood is another smart pick. Old furniture, pallets, or shipping crates can often be repurposed if they’re in decent shape. You’re saving money and keeping waste out of the landfill.
Now, here’s what you don’t want: pressure treated wood. It’s full of chemicals that can leach into your soil and eventually your food. Skip anything that looks like it was sealed with mystery goop. Also avoid paints and stains unless they’re labeled safe for soil contact or food gardens.
Got an old bookshelf, bed frame, or even dresser drawer? Great. Strip out the non essentials, and you might already have a frame ready to go. Hinges, handles, and hardware can usually be reused, too. Garden boxes don’t need to be pretty they just need to hold dirt and stay upright.
Building Your First Garden Box: Step by Step
Let’s keep it simple. For most small patios or yards, a 4 ft x 2 ft box is the gold standard. It’s big enough to grow a good mix of herbs and greens but small enough to slide against a fence or balcony wall. Height wise, aim for 10 to 12 inches. That gives roots enough depth without wasting soil.
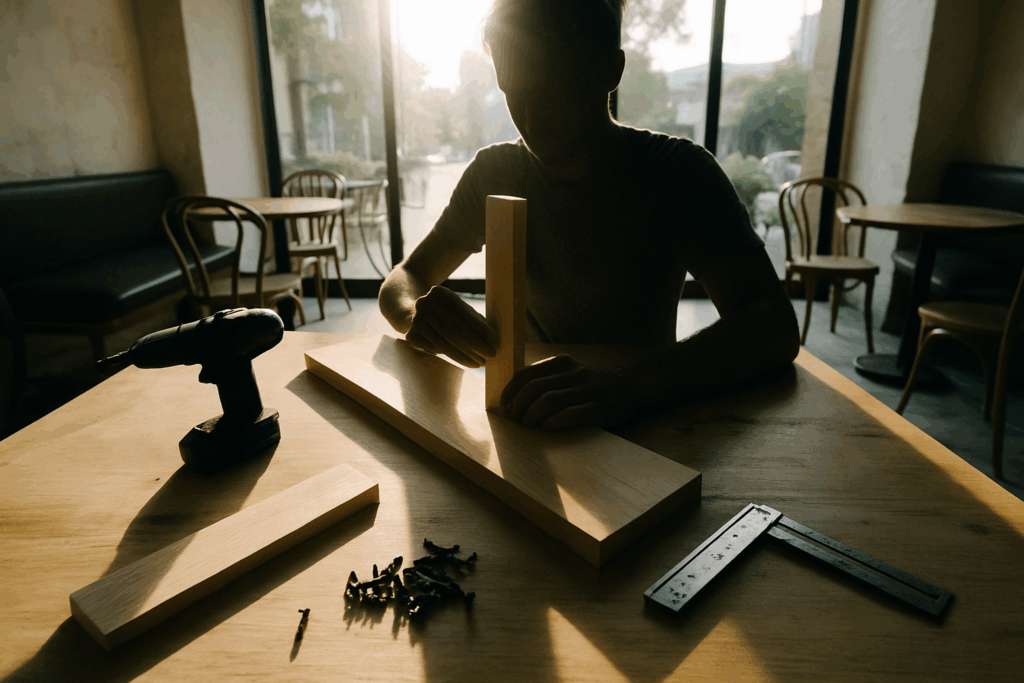
As for tools, the basics will take you far. A screwdriver, a miter saw (or handsaw if you’re old school), and some weatherproof wood screws are all you need. If you’ve got a power drill, even better you’ll move faster and your wrist will thank you.
When assembling the box, focus on support and drainage. Use galvanized screws to avoid rust. Reinforce corners with wood or metal L brackets if needed. Drill a few evenly spaced holes along the base or leave narrow gaps between bottom planks to let excess water escape. A garden box that holds water becomes a swamp don’t skip the drainage.
You don’t need to be a master carpenter. Just measure twice, cut once, and build it like you don’t want to rebuild it next season.
Soil That Helps You Win

Think of your garden box like a savings account what you put in early determines what you get out later. No shortcuts here: if you want strong growth and solid yields, it all starts with quality soil.
The ideal mix is simple but effective. Start with roughly 40% topsoil for structure and mineral base. Add 40% compost to bring in organic matter and nutrients. The final 20% should be an aeration material either vermiculite, perlite, or coconut coir. This keeps things loose and helps the roots breathe, especially in raised beds where drainage can make or break your progress.
Is premium soil pricey? Sometimes. But cheap fills loaded with bark chips or sand usually end up costing more when your plants stall out. If you’re on a budget, scout local compost cooperatives, municipal giveaways, or farm supply stores that sell in bulk. You can also stretch quality compost with lower cost topsoil, as long as you don’t skimp too much on the aeration component.
Bottom line: treat soil like your foundation. Build it once, build it right and most of the guesswork disappears.
What to Plant (and When)
Starting a garden box for the first time? Stick to crops that grow quick, are low maintenance, and offer solid payoff. Lettuce, radishes, herbs (like basil, parsley, or cilantro), and cherry tomatoes are your go to lineup. They don’t require a ton of space or skill, but still deliver satisfaction when it’s time to harvest.
Here’s a basic planting rhythm for 2026:
Spring (March May): Start lettuce, radishes, spinach, and peas. You can sow directly in the box after the last frost. Fast growers like radishes can be harvested in under 30 days.
Summer (June August): Shift to cherry tomatoes, basil, peppers, and bush beans. These love the heat and will fill out your garden box fast.
Fall (September October): Time to bring back the cool weather players. Think arugula, kale, and more radishes.
Now, let’s talk space efficiency. Companion planting is real and useful. Grow basil next to tomatoes to improve flavor and repel pests. Pair carrots with onions to confuse root dwelling bugs. Mix leafy greens like lettuce with herbs to use up light and soil depth smartly. The key is variety without chaos: one tall, one low, one aromatic. Your box will look better and grow stronger.
Whether you’ve got one box or four you’ll get more from your garden if you think seasonal and strategic. Plant with intention, not guesswork.
Maintenance Without the Stress
Starting a garden box is one thing. Keeping it alive is another. Thankfully, once the setup is dialed in, maintenance doesn’t have to be a time suck. Here’s how to stay on top of things without it becoming a second job.
Quick Daily/Weekly Checklists
Daily (5 10 min):
Glance over plants for wilt, yellowing, or bugs
Check soil moisture poke your finger in 1 2 inches deep
Water if dry (see below)
Weekly (15 30 min):
Snip dead or damaged leaves
Lightly aerate topsoil with a hand fork
Re apply compost tea or organic mulch if needed
Scan for signs of pest activity or disease
Watering Tips for Shallow Beds
Shallow beds dry out fast especially in peak summer. Go for a slow, deep watering early in the morning or in the evening. A drip line or soaker hose saves time and reduces splash back that can lead to disease.
Don’t just soak the surface. Make sure you’re watering enough to reach 4 6 inches deep. And when in doubt, skip a day overwatering causes more rookie problems than under watering.
Keeping Pests Out Without Going Full Pesticide Mode
You don’t need a hazmat suit to keep bugs off your basil. Most issues can be managed with a few basic defenses:
Use floating row covers or mesh netting for the most vulnerable crops
Introduce beneficial bugs like ladybugs or lacewings (great for aphid control)
Spray a neem oil + water mix weekly (safe, organic, and it works)
Keep the area around your boxes tidy no wet leaves or old debris for pests to party in
A balanced garden is a resilient one. Nip problems early, check in regularly, and be patient. DIY gardening is more marathon than sprint but way more worth it than store bought herbs.
Leveling Up as You Go
Once your first garden boxes are thriving, it’s only natural to dream bigger. Expanding your setup doesn’t require a huge backyard or budget it just takes a bit of planning and creativity.
Upgrade 1: Go Vertical
Maximize small spaces by building upward instead of outward. Vertical gardening allows you to grow more without sacrificing valuable ground area.
Stacking: Layer smaller boxes on shelves or wooden frames. Position sun loving plants on top.
Trellising: Use wooden trellises or wire grids to support climbing plants like beans, peas, or cucumbers.
Hanging options: Consider wall planters or rail hung containers for herbs and small vining crops.
These strategies are especially handy for balconies or compact patios with limited footprint.
Upgrade 2: Design That Works for You
Your garden should be functional, but that doesn’t mean it can’t look good too. Choose a design language that complements your outdoor space.
Decorative Frames: Add trim, lattice edging, or matching stains to coordinate with outdoor furniture.
Hardscaping: Outline beds with gravel paths or stepping stones to give structure and ease of access.
Modular Additions: Use planter boxes that match in style and size so you can reconfigure with the seasons.
An intentional design helps your setup feel like a true extension of your living space not just a few random boxes placed in a yard.
Bonus Inspiration
Looking for even more visual cohesion? Check out this related guide: The Art of Creating a Budget Friendly Accent Wall. While it’s geared toward indoor spaces, many of the same principles apply to outdoors color choice, texture contrast, and layout can all create a cohesive vibe in your garden zone.
Final Pro Tips
Setting up your first garden box is rewarding, but your success ultimately hinges on how you adapt and maintain your setup over time. Here’s how to avoid beginner pitfalls and keep your garden thriving beyond season one.
Common First Season Mistakes to Avoid
Many beginners get tripped up by simple missteps. Keep these in check:
Overcrowding plants: It’s tempting to plant a little of everything, but crowding inhibits growth and reduces yields.
Skipping proper drainage: Always drill adequate holes or leave spacing at the base poor drainage is the fast lane to root rot.
Using cheap soil: Poor quality filler soil can equal poor results. Invest in a healthy mix or blend your own.
Forgetting the sun: Make sure your box sits where it gets 6 8 hours of direct sunlight daily.
When to Rebuild, Seal, or Rotate
Even great setups need maintenance. Here’s when and how to get ahead of problems:
Rebuild frames if you notice warping, rot, or loose joints especially after a full year of exposure.
Seal wood boxes at the end of each growing season (choose food safe, outdoor grade sealants).
Rotate or amend soil every 1 2 seasons to avoid nutrient depletion. Add compost or swap in fresh organic matter as needed.
Find Your Garden Community
You don’t have to garden alone. Support and inspiration are easier to find than you might think:
Master gardener programs often offer free advice, workshops, and in person help.
Online garden forums like Reddit’s r/gardening or Facebook groups for local growers can provide fast, friendly answers.
Community gardens and local nurseries are perfect places to meet fellow gardeners, exchange tips, and even trade starter plants.
Whether you’re growing tomatoes on a balcony or lettuce in the backyard, staying connected and informed helps your garden and your confidence flourish.