I walk past terraces all the time in Oakland that are basically outdoor storage units.
Boxes piled up. Old furniture no one sits on anymore. Maybe a dead plant or two. You know the look.
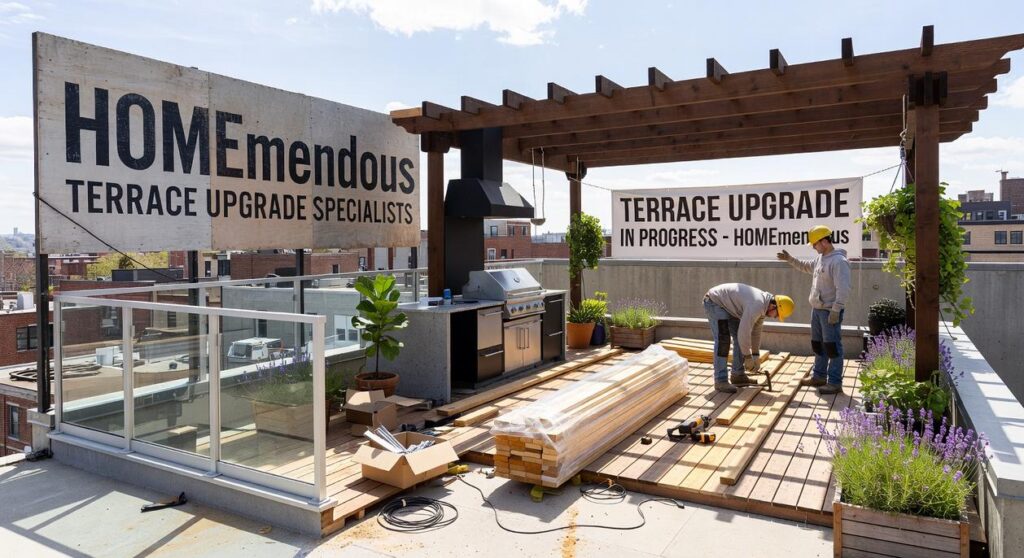
Your terrace could be the best space in your home. Instead, it’s probably the one you avoid.
I’ve helped people turn forgotten terraces into places they actually want to spend time. Morning coffee spots. Dinner party venues. Places where you can breathe.
The process isn’t complicated. You just need to know where to start and what actually works.
This guide walks you through everything. We’re talking about smart planning that fits your space and budget. Materials that last. Design choices that match how you actually live.
I’ve tested these approaches on real terraces. Not just theory or pretty pictures that fall apart after one season.
You’ll learn how to assess what you’re working with, make a plan that makes sense, and execute it without losing your mind or your savings.
By the end, you’ll have a clear path to a terrace upgrade homemendous that turns that neglected slab into your favorite spot in the house.
No fluff. Just what works.
Phase 1: The Blueprint for a Perfect Terrace Renovation
Most people start a terrace renovation by scrolling through Pinterest and buying furniture.
Big mistake.
I see it all the time. Someone drops two grand on a sectional before they even know if their terrace can handle the weight. Or they install a pergola that blocks the only good sunlight their space gets.
Here’s what actually works.
Define Your Terrace’s Purpose
You need to pick one main function. Not three. One.
Is this a place where you’ll host weekend barbecues? A quiet spot for morning coffee? A container garden for growing herbs? Or a safe play area for kids?
I know what you’re thinking. Why can’t it be all of those things?
Because when you try to make a space do everything, it ends up doing nothing well. A 200 square foot terrace can’t be a yoga studio and a dining area and a garden. The math just doesn’t work.
Pick your priority. Everything else is secondary.
Assess Your Canvas
Now measure everything.
Length, width, and most importantly, weight capacity. Your building’s structural engineer can tell you the load limits. Don’t skip this step (I’ve seen decks fail because someone assumed it could handle a hot tub).
Track sun exposure throughout the day. Where does morning light hit? Which corners stay shaded? This matters more than you think when you’re picking plants or deciding where to put seating.
Note the wind patterns too. That corner that feels perfect at noon might turn into a wind tunnel at sunset.
Budgeting for Success
Here’s where people get it wrong again.
They set a total budget but don’t break it down. Then they blow half their money on decking and have nothing left for furniture.
Create categories. Flooring, structures, furniture, lighting, plants. Assign dollar amounts to each one based on what you actually need.
And add 15% for contingency. Not 5%. Not 10%. Fifteen percent.
Because you will find rotted joists. Or discover your electrical outlet doesn’t work. Or realize the cheap pavers you wanted are backordered for three months. As you navigate the challenges of home improvement, from rotted joists to backordered pavers, you’ll soon understand why the term “Homemendous” perfectly encapsulates the chaos and triumph of turning your house into a dream home.
The homemendous garden infoguide by homehearted breaks down typical cost ranges if you need a starting point.
Check Regulations and Rules
Nobody wants to think about permits.
But you know what’s worse than dealing with paperwork? Tearing down a structure you just built because it violates code.
Call your city’s building department. Ask what requires permits in your area. Some places don’t care about pergolas under a certain size. Others require approval for anything you bolt down.
If you’re in a condo or HOA, read those rules too. I’ve seen associations that ban fire pits, restrict plant heights, or require pre-approval for color changes.
Better to know now than after you’ve spent money on your terrace upgrade homemendous style.
Phase 2: Building from the Ground Up with Flooring & Structures
Your terrace floor isn’t just something you walk on.
It’s what people notice first. It sets the mood for everything else you’ll add later.
I’ve seen people drop thousands on furniture and plants, only to realize their crappy flooring ruins the whole vibe. Don’t make that mistake.
Let me walk you through what actually works.
Composite Decking lasts about 25 years with minimal upkeep (according to the National Association of Home Builders). It won’t rot or attract termites. You’ll pay more upfront but save on maintenance costs over time.
Interlocking Deck Tiles are perfect if you’re working with an existing concrete slab. I installed these on my own terrace in Oakland last summer. Took me a weekend and zero special tools.
Outdoor Porcelain Pavers can handle freeze-thaw cycles better than natural stone. They come in styles that mimic wood, concrete, or marble. The durability is real too. Most manufacturers rate them for 50+ years.
Artificial Turf has come a long way. Modern versions drain water at rates up to 30 inches per hour, so you won’t deal with puddles.
Some people say artificial turf looks fake and feels wrong underfoot. Fair point. Cheaper versions do look plasticky. But if you want a green space without watering or mowing, it solves a real problem.
Now let’s talk about making your terrace feel like an actual room.
You need vertical elements. Walls, screens, something that defines the space and gives you privacy.
Privacy Screens block sightlines and cut wind by up to 70% depending on the material. Wood looks warm but needs treatment every few years. Metal and composite options last longer with less fuss.
Vertical Gardens give you greenery without eating up floor space. A 4×8 foot living wall can hold 50+ plants. That’s a lot of green in just 32 square feet.
Pergolas create what designers call “outdoor rooms.” They don’t provide full shade (usually about 50% coverage), but they make a space feel intentional. Add a retractable canopy and you control how much sun gets through.
Here’s what matters most.
Your flooring choice affects everything that comes after. Pick something durable that fits your climate and maintenance tolerance. Then use vertical structures to turn an open terrace into a space that actually feels like yours.
The terrace upgrade Homemendous approach isn’t about following trends. It’s about building something that works for how you live.
Phase 3: Furnishing Your Outdoor Living Room

You’ve got the structure down. You’ve added the greenery.
Now comes the fun part.
Picking furniture that actually works for your space (and won’t fall apart after one rainy season).
Start with Materials That Last
I’m going to be straight with you. Cheap outdoor furniture is a waste of money.
You’ll replace it in two years. Maybe less.
Go with powder-coated aluminum if you want something light that won’t rust. Teak if you like the way wood ages over time. Or high-quality synthetic wicker that looks real but handles weather better.
Some people say you should just bring your indoor furniture outside and cover it when it rains. Sure, you could do that. But you’ll spend half your time dragging things in and out, and the other half watching your cushions get moldy. Instead of struggling with the hassle of moving indoor furniture outdoors only to face the inevitable mold and wear, consider investing in the innovative solutions highlighted in the Garden Infoguide Homemendous, which can transform your outdoor space effortlessly.
I’d rather buy once and be done with it.
Think in Zones
Even a small terrace feels bigger when you break it into areas.
Put your lounging spot in one corner. An outdoor sofa with a coffee table works great. Then add a dining area on the other side. A bistro set if you’re tight on space or a full table if you’ve got room.
This is where your Garden Infoguide Homemendous planning pays off. You already know what fits.
Get Furniture That Does Two Things
Storage ottomans. Benches with hidden compartments. Nesting tables you can tuck away.
When you’re working with limited space, every piece needs to earn its spot. I use a storage bench that holds all my outdoor pillows when I’m not using them. Keeps them dry and gives me extra seating.
Works perfectly for a terrace upgrade homemendous style.
Don’t Skip Comfort
Here’s what matters most. You won’t use your outdoor space if it’s not comfortable.
Get real outdoor cushions made from solution-dyed fabrics like Sunbrella. They resist fading and water. They don’t get that gross mildew smell after a few weeks.
Yes, they cost more upfront. But you’re not replacing them every season.
Phase 4: The Final Layer: Lighting, Greenery, and Decor
You’ve got the bones in place. Now comes the part that actually makes you want to spend time out there.
I’m talking about the details that turn a functional terrace into a space you can’t wait to show off.
Start with lighting.
Most people think one overhead fixture does the job. It doesn’t. You need layers if you want that warm glow that makes everything look better after dark.
String lights give you that soft ambient wash. The kind that makes your face look good in photos and your wine taste better. I hang mine overhead in a loose pattern because perfectly straight lines feel too rigid.
Then add task lighting where you actually do things. A wall sconce by the door so you’re not fumbling with keys. A focused light over your dining table so you can see what you’re eating (and who you’re eating with).
Accent lights are where it gets fun. Small spotlights aimed at a textured wall or a beautiful plant create shadows and depth. The terrace stops feeling flat.
Now bring in the plants.
This is where your terrace upgrade homemendous really comes alive. Container gardening gives you flexibility that in-ground beds never will.
Mix your pot sizes. A few large planters anchor the space while smaller ones fill gaps and add variety.
I use the thriller, filler, spiller method because it works. One tall plant in the center catches your eye. Mounding plants around it add fullness. Trailing plants spill over the edges and soften hard container lines.
Pick plants that match your conditions. Full sun? Go with succulents or lavender. Shady corner? Ferns and hostas thrive there.
Touch the leaves when you’re shopping. Smooth, fuzzy, waxy. Different textures make the whole arrangement more interesting.
Finish with the personal stuff.
An outdoor rug defines your seating area and feels good under bare feet. Choose one that can handle weather but still looks like something you’d want inside.
Throw pillows add pops of color and give you something soft to lean against. I keep mine in weatherproof covers because I’m lazy about bringing them in.
A water feature adds that trickling sound that somehow makes everything feel calmer. Or go with a portable fire pit if you want warmth and a reason for people to gather close. To enhance your outdoor oasis with tranquil water features or cozy fire pits, be sure to consult the Homemendous Garden Infoguide by Homehearted for expert tips and inspiration.
These final touches don’t just decorate. They create the feeling you’re after.
Your Amazing New Terrace Awaits
You now have everything you need to pull off a terrace renovation that actually works.
No more staring at that sad outdoor space wondering what to do with it. You’ve got the framework and the steps to make it happen.
When you plan your layout right and pick materials that last, something shifts. Your terrace stops being that forgotten corner of your home. It becomes a place where you actually want to spend time.
This isn’t just about adding square footage. It’s about creating a space that changes how you live at home.
Here’s what you need to do: Start with your vision. Picture how you want to use this space. Then work backward from there.
The terrace upgrade homemendous approach is simple. Define what you want, choose your materials, and add the touches that make it yours.
Your outdoor oasis is waiting. Time to build it.
 There is a specific skill involved in explaining something clearly — one that is completely separate from actually knowing the subject. Malric Yelthorne has both. They has spent years working with home design inspirations in a hands-on capacity, and an equal amount of time figuring out how to translate that experience into writing that people with different backgrounds can actually absorb and use.
Malric tends to approach complex subjects — Home Design Inspirations, Gardening and Landscaping Advice, DIY Projects and Ideas being good examples — by starting with what the reader already knows, then building outward from there rather than dropping them in the deep end. It sounds like a small thing. In practice it makes a significant difference in whether someone finishes the article or abandons it halfway through. They is also good at knowing when to stop — a surprisingly underrated skill. Some writers bury useful information under so many caveats and qualifications that the point disappears. Malric knows where the point is and gets there without too many detours.
The practical effect of all this is that people who read Malric's work tend to come away actually capable of doing something with it. Not just vaguely informed — actually capable. For a writer working in home design inspirations, that is probably the best possible outcome, and it's the standard Malric holds they's own work to.
There is a specific skill involved in explaining something clearly — one that is completely separate from actually knowing the subject. Malric Yelthorne has both. They has spent years working with home design inspirations in a hands-on capacity, and an equal amount of time figuring out how to translate that experience into writing that people with different backgrounds can actually absorb and use.
Malric tends to approach complex subjects — Home Design Inspirations, Gardening and Landscaping Advice, DIY Projects and Ideas being good examples — by starting with what the reader already knows, then building outward from there rather than dropping them in the deep end. It sounds like a small thing. In practice it makes a significant difference in whether someone finishes the article or abandons it halfway through. They is also good at knowing when to stop — a surprisingly underrated skill. Some writers bury useful information under so many caveats and qualifications that the point disappears. Malric knows where the point is and gets there without too many detours.
The practical effect of all this is that people who read Malric's work tend to come away actually capable of doing something with it. Not just vaguely informed — actually capable. For a writer working in home design inspirations, that is probably the best possible outcome, and it's the standard Malric holds they's own work to.